Grass can be planted anytime during the growing season, but you can benefit from fall’s cooler temperatures. Grass is popular amongst lawn owners and isn’t very difficult to grow. However, timing and techniques matter. Since the fall season is coming, here are a few tips on successfully planting grass during this season.
The Best Time for Grass Seeding
The right time for grass seeding depends on where you live and the kind of grass you’re working with. Cool-season grasses like Kentucky bluegrass or tall fescue prefer the cooler temperatures of fall. Spring and early summer are more favorable for planting warm-season grasses such as Bermudagrass and centipede grass. If you decide to plant in the fall, it should be done 45 days before the expected first frost date at a minimum!
The truth is that grass can be planted during both seasons. If you live in the North, it’s better to start in the fall, while spring is better in the South. However, fall is the perfect time for overseeding Southern lawns with cool-season grass. It will help them stay green when winter comes. So, definitely consider fall seeding!
Choosing Seeds and Preparing
Choose a seed mix ideal for the climate and conditions. You need to make sure the seeds are resistant to factors like drought or lots of people walking over them. There are mixes combined for specific problem situations. A popular one might include Kentucky bluegrass if you want thick grass that’s nice to lay on, or you could choose perennial ryegrass to hold up under tons of feet walking over it.

You also need to get the soil ready for planting. This is particularly important if you live in an area where there’s a lot of clay in the soil. Loosen compacted soil with a tiller, or add some compost if the soil quality isn’t the best.
Planting and Watering
Once you prepare the soil, it’s time to spread out the seeds. If you work with small batches, you can do it by hand, but for larger areas, you’ll need a drop spreader. After that, use a garden rake to lightly work the seed 1/4-inch into the soil. If you want to do a big area like a lawn, rent or invest in a lawn roller for better seed-to-soil contact. Then, mulch the soil with straw or a biodegradable seed starter made from paper, an adhesive, and fertilizer for seed germination.
Despite using mulch to help the soil retain moisture, you’ll still need to water it. Keep the seeds moist but never soggy. A mulched area needs to be watered each morning, and an unmulched one needs light watering two to three times every day.
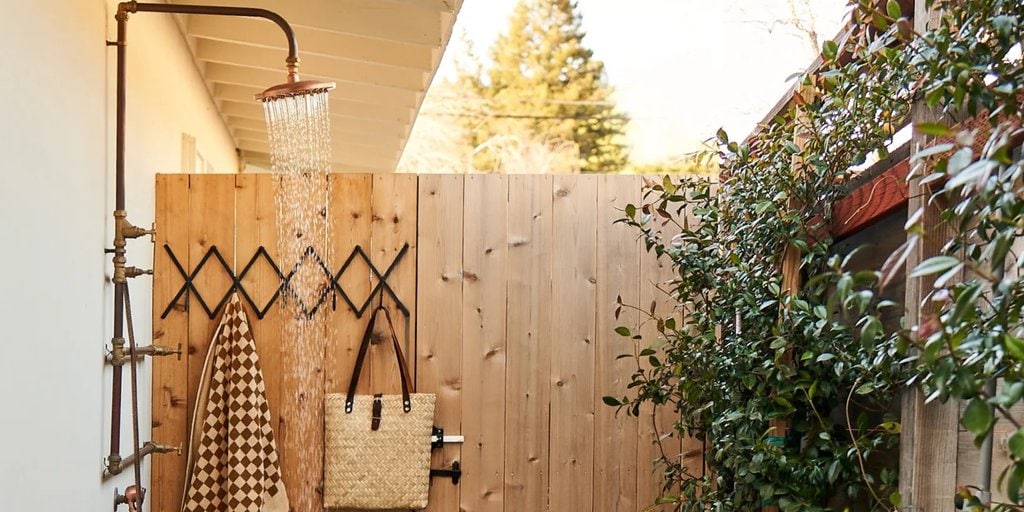
A Step-By-Step Guide How to Install an Outdoor Shower
People who want to have an outdoor shower can do so with a DIY project. Such a home addition is great for cleaning up before diving in the pool or after swimming, and it also has many other uses. With this guide, you can learn how to build an outdoor shower for your home.
A DIY Outdoor Shower
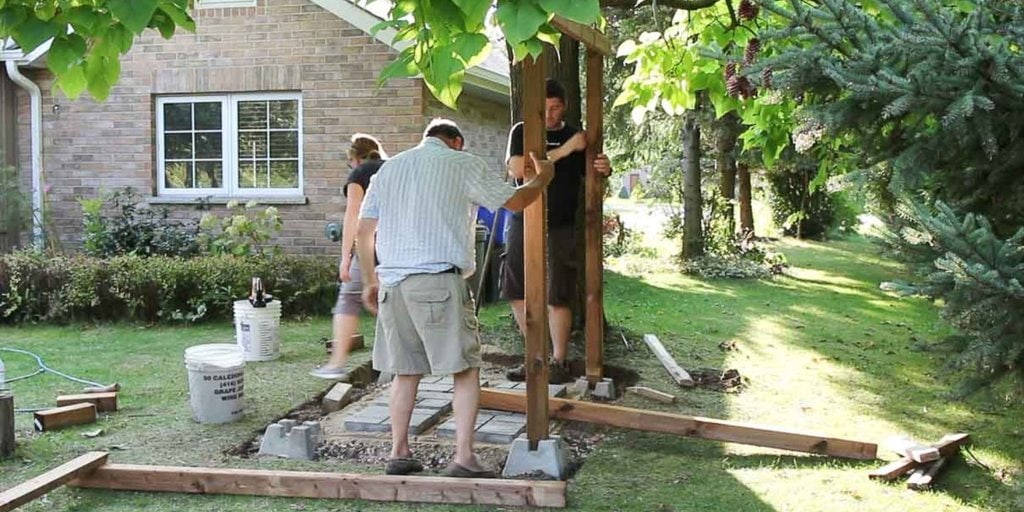
To connect your outdoor shower to an existing exterior spigot, determine its position in relation to the spigot’s exit point. For a hot and cold water shower, locate the corresponding supply lines inside your home. Professional plumbers or a metal detector can help locate them in a finished home. Use a drywall knife to create an opening in the wall, revealing the hot and cold water lines.
Dig 3-foot holes at each corner of a 4-foot by 4-foot area and fill them with 6 inches of drainage gravel. Insert 8-foot 4×4 posts, ensuring they are plumb, and fill the holes with concrete. For freestanding showers, use a 10-foot 4×4 post in the center for added support. Allow the concrete to set for 24 to 48 hours. Proceed with the plumbing after the posts have been set. PEX plumbing lines are user-friendly with the right tools, while copper lines require a blow torch and soldering or professional assistance.
Planning and Precision Are Key
For a cold water shower, mount the showerhead and valve assembly. Connect a pipe from the bottom of the shower to the showerhead, using a 90-degree FIP at the top and a 90-degree MIP or hose adapter at the bottom. Secure the piping to the post with C-shaped hangers and attach the showerhead and garden hose.
For a hot and cold shower, drill holes in the wall for the supply lines to exit. Cut the supply lines, install plumbing tees and isolation valves, and redirect the piping with 90-degree fittings to the outdoor shower. Follow the manufacturer’s instructions to attach the supply lines to the shower valve assembly. Connect an additional pipe from the valve to the showerhead using a 90-degree threaded FIP. Seal the holes with silicone caulk, turn on the water, and check for leaks. Test the shower assembly.
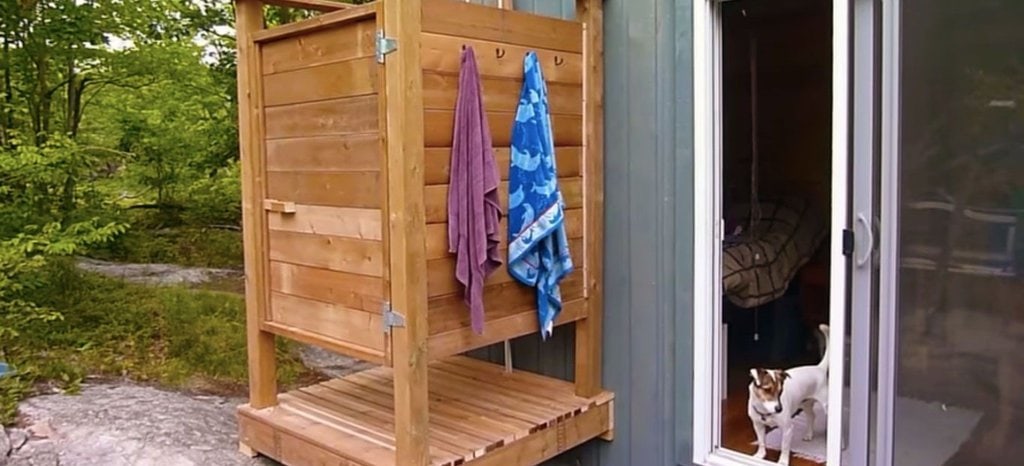
Constructing the Frame
Create a drainage area by digging a 1-foot deep, 4-foot by 4-foot space. Build a frame using two 8-foot 2x4s cut in half and fill it with drainage gravel, tamping it down firmly. Build the wood floor by assembling a frame with three 44-1/2-inch lengths of 2×4 boards for support. Lay ten 4-foot floorboards, cut from five 8-foot 2x4s, with a 1/8-inch gap between them. Secure the floor to the support posts and ensure it is level. Mount stringers cut from 2×4 boards to the support posts using joist hangers. Position them at the desired heights for the bottom and top stringers.
Install privacy wall boards using 1-inch screws, attaching them across the stringers. For showers with a door or gate, add horizontal stringers spaced about 32 inches apart. Attach the privacy wall boards to the door or gate stringers with 1-inch screws. If a door or gate is present, attach a gate hinge on one side and a gate latch assembly on the other side. Ensure the gate swings freely by leaving a slight gap from the ground. Once installed, clean up and enjoy the refreshing outdoor shower.